Cross section analysis is a vital technique for examining the internal structure of materials. We create polished surfaces and use advanced microscopy, including optical and SEM, along with EDX microanalysis, to gain detailed insights into the composition and structure of materials. This approach is essential for ensuring the quality and reliability of materials across various industries.
Why Cross Section Analysis Matters
Cross section analysis is crucial for several reasons:
- Quality Control: We identify manufacturing defects such as voids, inclusions, and poor bonding to ensure that materials meet rigorous quality standards.
- Failure Analysis: By studying the internal structure of failed components, we determine the root causes of failures and devise strategies to prevent recurrence.
- Material Characterization: Our analysis provides thorough information about the composition and microstructure of materials, guiding the selection of the right materials for specific applications.
- Process Optimization: We analyze the impact of different manufacturing processes on materials, optimizing these processes to enhance the performance and durability of final products.
Our Cross Section Analysis Services
At Anderson Materials Evaluation, we deliver comprehensive cross section analysis services using the latest techniques and equipment. Our offerings include:
Metallographic Analysis
We perform metallographic analysis through cross section polishing, and sometimes use chemical or electrochemical etching to reveal metallographic structures. This enables us to observe the grain structure, phase distribution, and other microstructural features of metals.
Optical and SEM Microscopy
We employ both optical and scanning electron microscopy (SEM) to capture high-resolution images of the cross-sectioned samples. SEM provides greater magnification and depth of field, letting us to see fine details that optical microscopy might miss.
EDX Microanalysis
Energy-dispersive X-ray spectroscopy (EDX) accompanies our SEM analysis to conduct elemental analysis of the samples. This helps us identify the chemical composition and distribution of elements within the material.
XPS and XRF Analysis
For some applications, we examine areas on polished cross sections using X-ray photoelectron spectroscopy (XPS) or X-ray fluorescence (XRF) analysis. These techniques provide additional insights into the surface chemistry and elemental composition of materials.
Illustrative Examples
Here are some examples of our cross section analysis work:
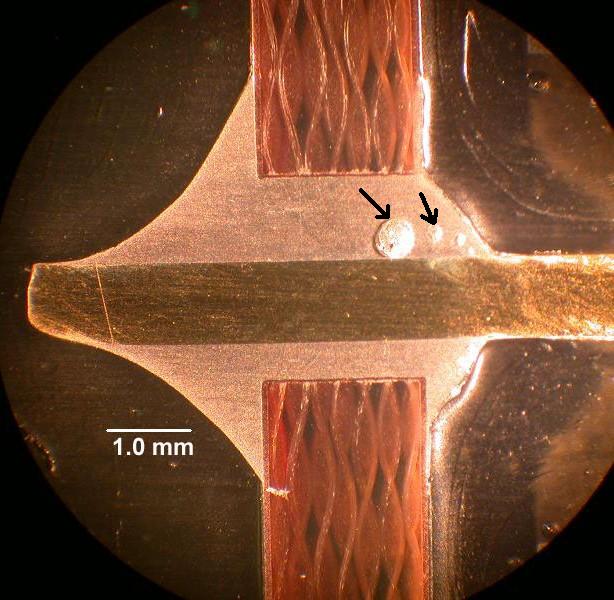
- Voids in Solder Joints: We identified voids in the solder on the connector side of a printed circuit board. The analysis showed poor wetting on the lead, suggesting contamination that create gas, causing the voids.
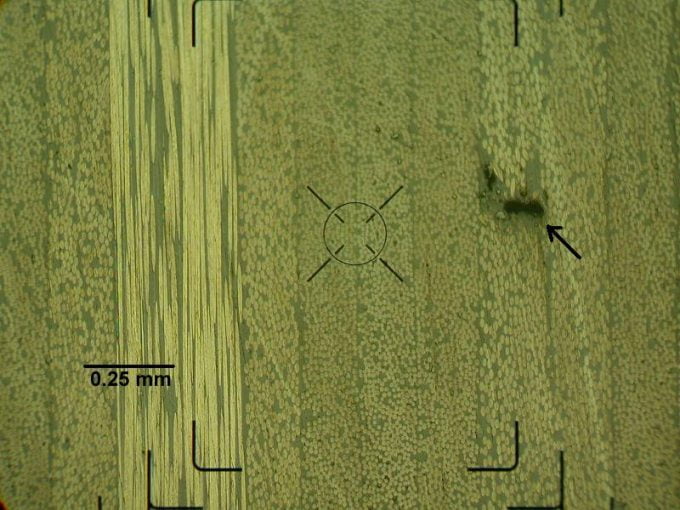
- Fiber Reinforced Plastic (FRP): Our analysis of an FRP cross section revealed multiple layers of fibers, with one layer showing a large void.
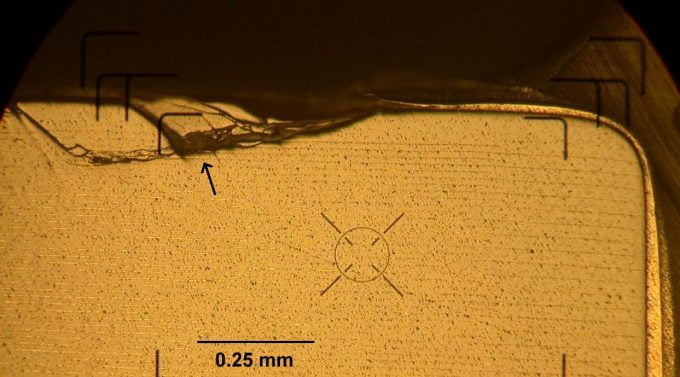
- Ceramic Capacitor Fracture: We looked at a green ceramic capacitor and found a broken edge, suggesting inappropriate handling during welding assembly.
Metallographic Analysis Examples
In addition to the above examples, our cross section analysis has been applied to various metallographic analyses, including:
- Graphitic Corrosion: Investigation of graphitic corrosion in grey cast iron.
- Inclusions in Steel: Identifying and testing inclusions in steel.
Abrasion-Coated Polycarbonate Example
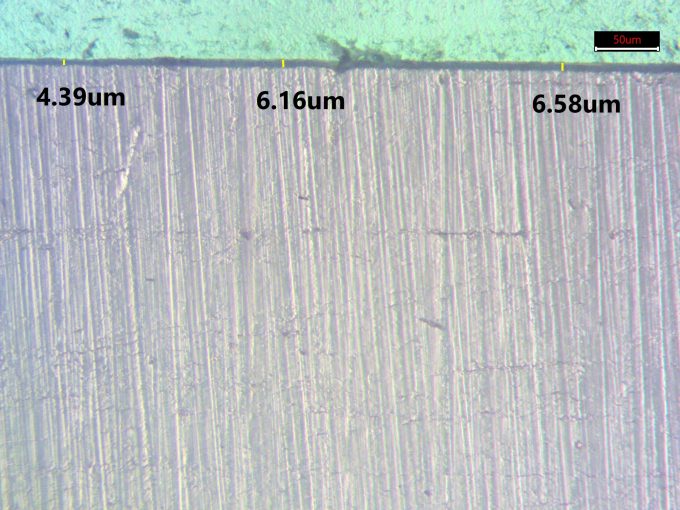
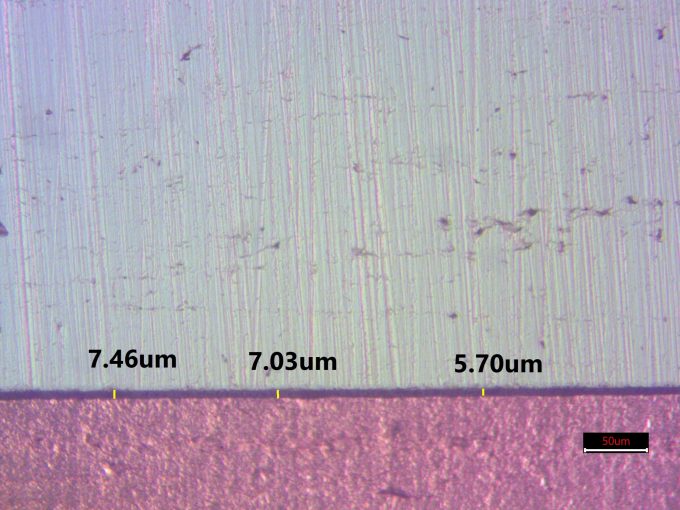
We also examine surface coatings through cross section analysis. For example, we compared the thickness of abrasion-resistant coatings on two polycarbonate sheet products. The optical photomicrographs below illustrate the thickness measurements, showing variations in the coating processes and quality.
Product 1
- Optical photomicrograph showing the cross section of polycarbonate with abrasion-resistant coating.
Product 2
- Optical photomicrograph showing the cross section of polycarbonate with abrasion-resistant coating.
Contact Us
At Anderson Materials Evaluation, we are committed to providing accurate and helpful cross section analysis services to help you maintain the integrity and performance of your materials. Reach out to us today to discuss your project requirements and learn how our advanced techniques can support your industry.
